Hello, and welcome back to the SloopStash blog! We’re excited to have you here with us! Before we dive into this blog post, we want to ensure you have a basic understanding of the Linux or Windows operating system and VM technologies. If these concepts are new to you, some of the information may be a bit challenging to follow.
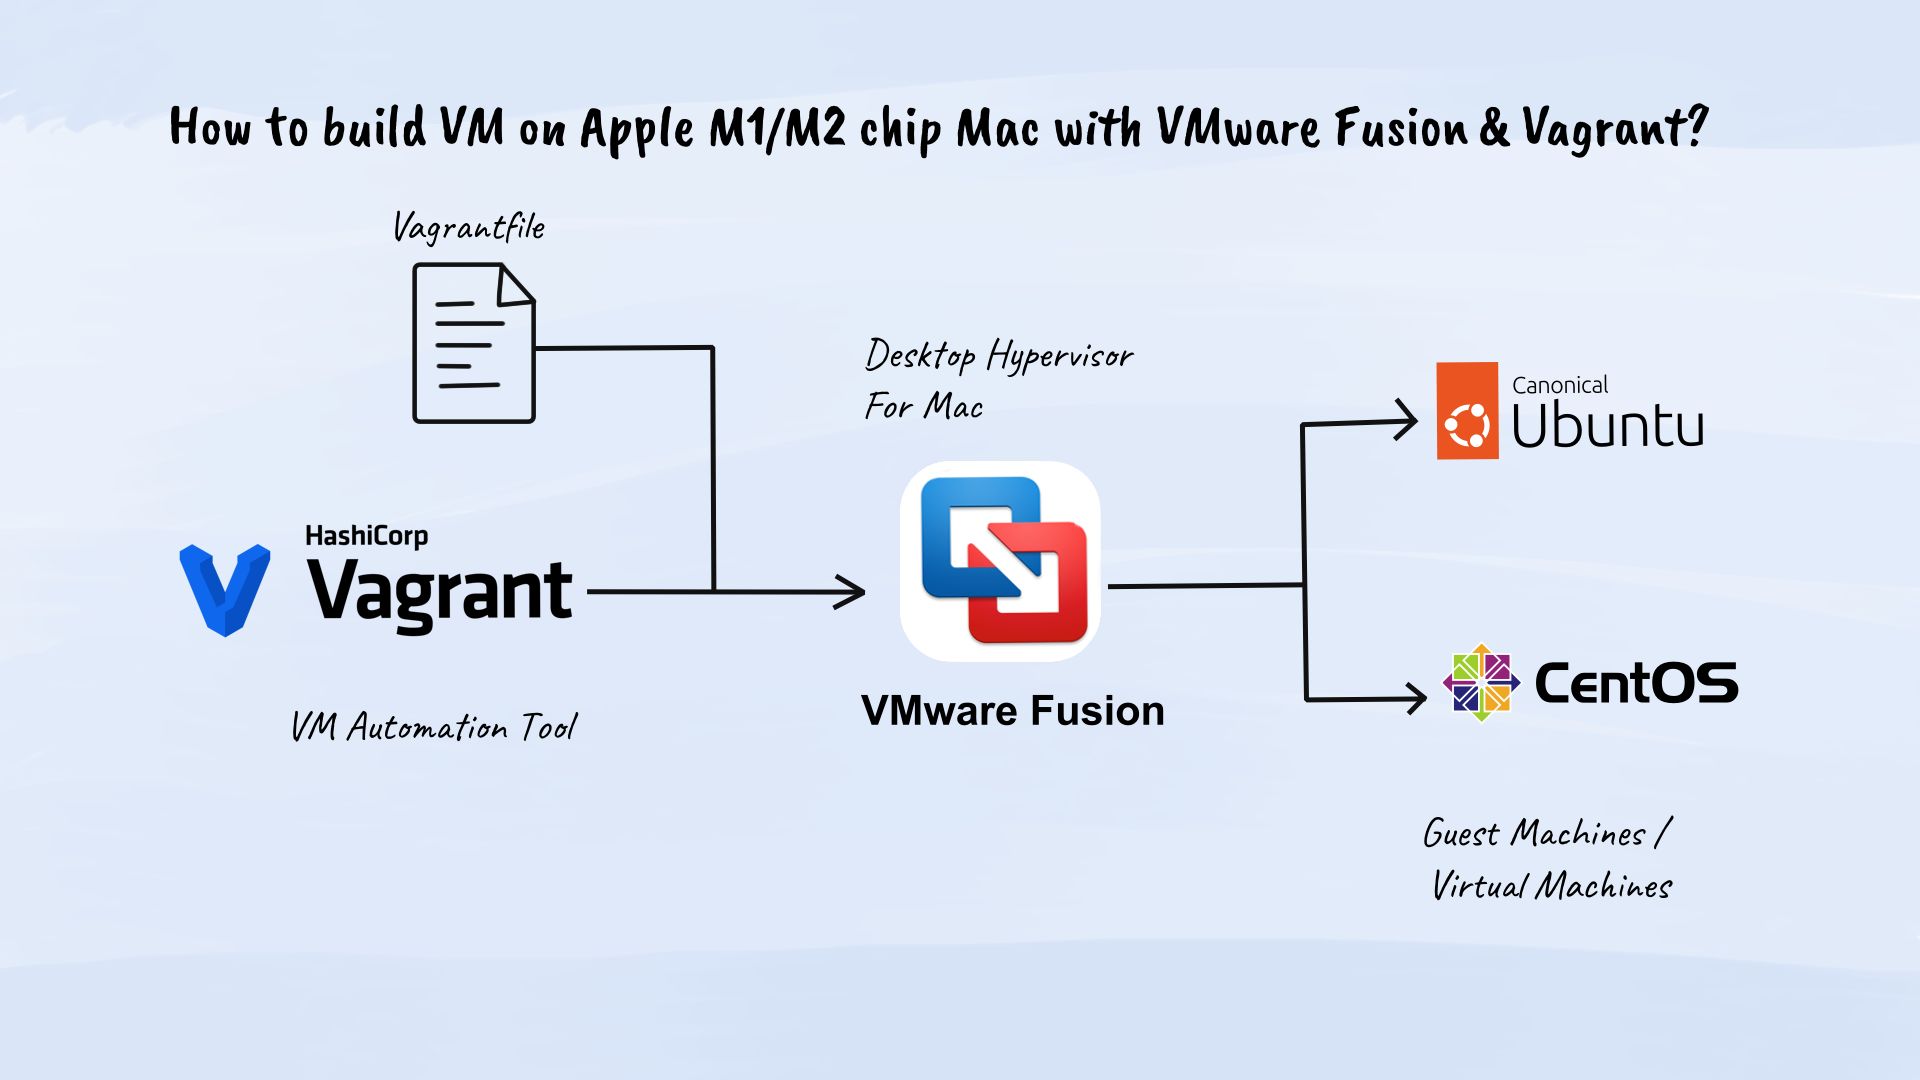
Apple recently introduced the Apple silicon (M1, M2, M3) chip for its Macs and iPads, which offers a wide range of new features and advantages. However, software developers and IT professionals faced challenges when trying to deploy and manage VMs on the Mac operating system using commonly used Type 2 or hosted hypervisors like VirtualBox. After a long wait, a solution has finally emerged in the form of VMware Fusion. In this blog post, we will delve into the process of building, deploying, and automating multiple VMs on Macs with Apple silicon (M1, M2, M3) chips using VMware Fusion and Vagrant.
It is important to understand that we are developing a robust method for building, deploying, automating, and managing multiple Linux and Windows VMs on your Apple silicon (M1, M2, M3) Mac operating system for development and testing purposes. This approach enables us to effectively scale multiple Linux and Windows VMs across various on-premise infrastructures, whether on a local developer machine or a dedicated server. By utilizing VMware Fusion hypervisor, along with VM automation tools like Vagrant, we can streamline the process of building and running different Linux distributions and Windows versions as VMs, effectively covering every use case.
Install VMware Fusion and Vagrant on Apple silicon (M1, M2, M3) Mac
To effectively build, deploy, and run multiple Linux and Windows VMs for your development and testing projects, it’s important to have VMware Fusion, Vagrant, and its add-ons installed on your Apple silicon (M1, M2, M3) Mac operating system.
Start by installing VMware Fusion, along with VM automation tools like Vagrant and its add-ons. This setup will allow you to build and run multiple Linux and Windows VMs smoothly and parallelly. Please refer to the documentation below to install VMware Fusion, Vagrant, and its add-ons.
Build Linux and Windows VMs using Vagrant
After installing VMware Fusion, Vagrant, and its add-ons on your Apple silicon (M1, M2, M3) Mac operating system, you can start building multiple Linux and Windows VMs using it. Our SloopStash Linux starter-kit and SloopStash Windows starter-kit effortlessly streamline the process of building, deploying, automating, and managing multiple Linux and Windows VMs in the Mac operating system.
Getting started with SloopStash Linux starter-kit and SloopStash Windows starter-kit
Building, deploying, automating, and managing multiple Linux and Windows VMs for your development and testing projects has been made easier with our SloopStash Linux starter-kit and SloopStash Windows starter-kit. These starter-kits include all the necessary code, configuration, tools, and technical resources required for the automated building of multiple Linux and Windows VMs using VM management tools such as Vagrant and VMware Fusion. Please refer to the documentation below to get started with the SloopStash Linux starter-kit and SloopStash Windows starter-kit.
- Getting started with SloopStash Linux starter-kit
- Getting started with SloopStash Windows starter-kit
Build Linux and Windows VMs using Vagrant automation
To build, deploy, automate, and manage a single Linux or Windows VM using Vagrant, you need to follow two main steps.
First, configure the environment variables that specify the Linux distribution or Windows version (such as CentOS Linux, Ubuntu Linux, Amazon Linux, Alma Linux, Rocky Linux, Windows 10, or Windows 11), the processor architecture (either AMD64 or ARM64), the edition (server or desktop), and the hypervisor (VirtualBox or VMware) that will be used by the Vagrant CLI. This configuration allows Vagrant to execute the appropriate Vagrant configuration.
Second, run the Vagrant configuration to automate the build and deployment of the Linux or Windows VM based on the configured environment variables in the previous step.
In the same way, you can build and run multiple Linux and Windows VMs with different distributions and versions. For detailed guidance on building and running multiple Linux and Windows VMs with Vagrant and VMware Fusion, please refer to the documentation linked below.
We trust that this blog post on Linux, Windows, and VMs has provided valuable insights. Please reach out to us if you’re looking for tailored solutions or training in these kinds of technologies—whether as an individual or for your organization. We’re here to help you succeed!